 |
 |
|
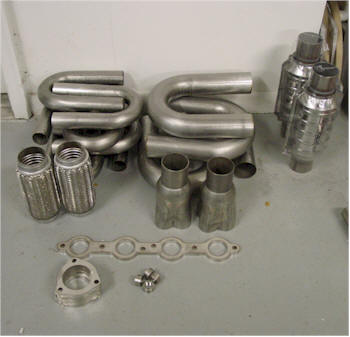
We contacted our friends at Stainless
Works in Ohio
http://www.stainlessworks.net/ to supply all of the exhaust
materials. They have one of the largest stock of Stainless steel
in the US. Very high quality materials and fantastic customer
service. I contacted Al Noe and within a couple weeks, we had a
collection of U and J bends, collectors, 02 Bungs, Flanges, straight
tubing, header flanges and a pair of Flex joints. They carry a
large variety of stainless parts for many engines. They were
the only ones we could find that had the LS1 header flanges! |
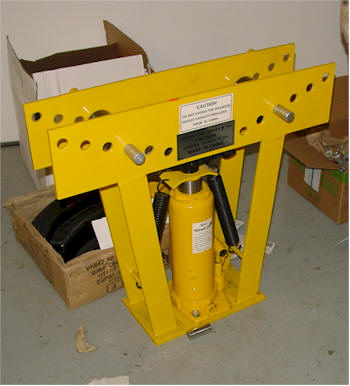
If you did not catch before we started
we invested in a Tube Bender for some simple compound bending.
It was $100 and so far well worth it. We do not recommend
bending your own exhaust however it comes in handy when you need to make
a support brace. |
 |
 |
|
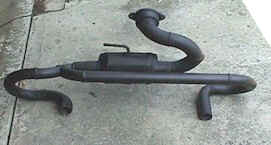
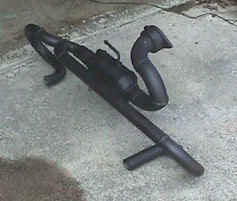
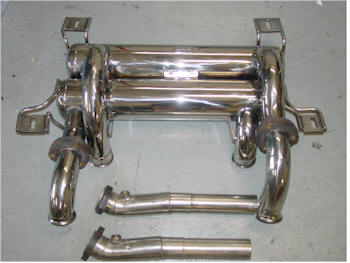
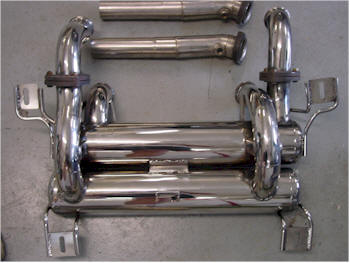
Yep we are going all out. This
is an original Diablo Tubi Style exhaust. It is 100% Stainless steel
which is why we decided to go all stainless. |
 |
 |
|
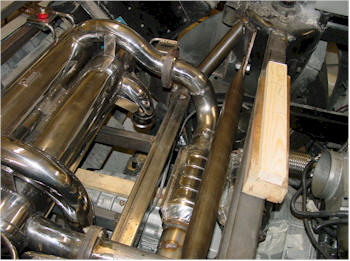
Test fitting shows plenty of room. |
Since we wanted to fabricate the
headers with the engine OUT of the car we needed the collector
flange in it's proper location, so we decided to build the exhaust
in reverse order from the muffler forward. |
 |
 |
|
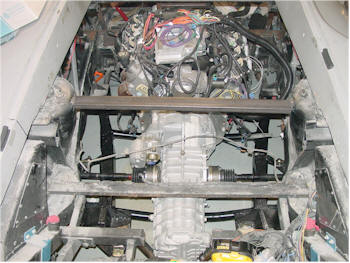
Our first step was to gut all the old
chassis. before we did, we installed a temporary strut tower brace. |
So much more room now. We gutted
it even more since the rear bumper support had to be cut for the
transaxle we wanted it re-engineered. |
 |
 |
|
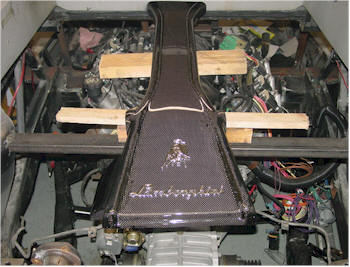
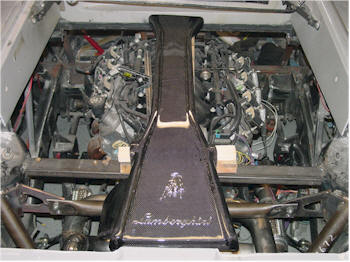
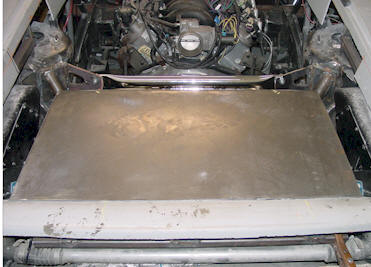
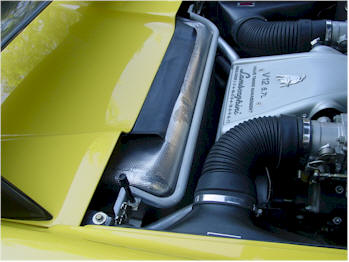
An important piece, the engine cover
allowed us to properly place the components without interfering with
the later intake manifold, air and water tubing. We needed
more detail pictures of the original engine compartment.
|
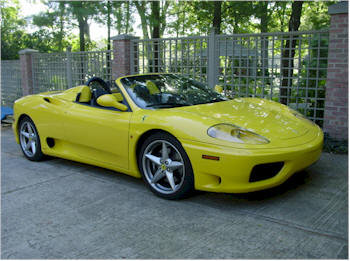
I visited my friend John to get some
more pictures of his Lamborghini and he got himself a 360 Ferrari.
.....(Yes he has both cars Lamborghini Roadster and 360 Ferrari)
he tells me that he is not planning on buying any more cars.
This was a very nice car. With about 50 more pictures in hand
I headed back to the garage. |
 |
 |
|
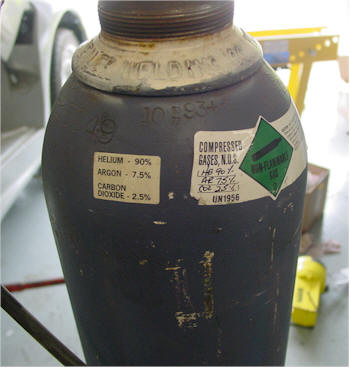
Now when working with Stainless Steel
it is recommended that you Tig weld. You can however tack it
together with a MIG and you can use regular steel wire however if
you do not remove the steel with it is TIG'ed then there will be
rust spots and discoloration. We decided to rent a Tri-Mix for
stainless steel welding and a small spool of 304 Stainless wire. We
will tack the whole exhaust together then take it to a master TIG
welder to be fully welded. The it will be polished to remove all the
welds. |
 |
 |
|
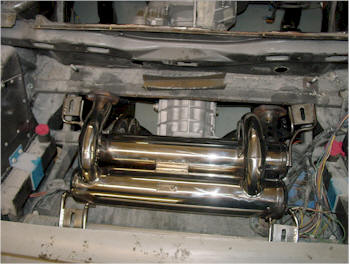
The Exhaust was started with the
Muffler mounted, |
If you look you can see our new bumper
mounting bars. |
 |
 |
|
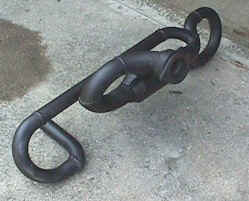
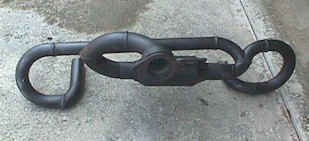
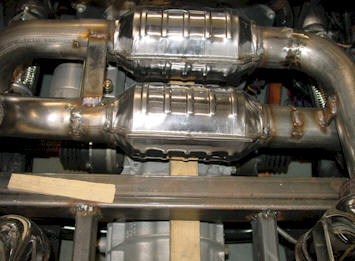
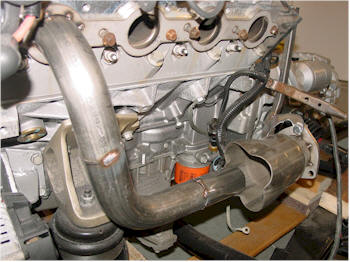
since we wanted to retain the
emissions on the engine we wanted to install Catalytic converters.
Putting the flex joint and the Cat together would put the collector
too far forward and we did not want that. After a few hours of
thought we decided to angle it back over using some dead space with
the old design plan. |
This allows the collector flange to
extend past the block. We now have our collector location! |
 |
 |
|
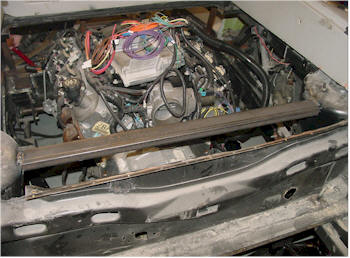
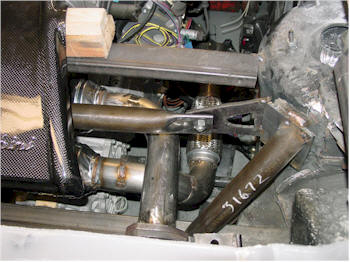
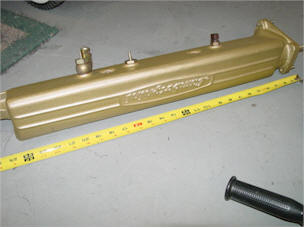
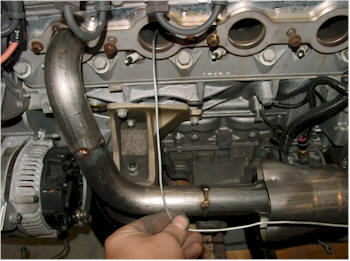
Since we removed the old "trunk back"
support again it left the chassis with less support. so we needed to
reinstall the and beef up the cross support. |
Since we wanted access to the exhaust
components it was decided that we make a removable brace.
Using .95 (Thick) tubing and about 10,000 lbs of pressure we
flattened the ends and drilled out 1/2" holes and created a support
on each shock tower. We also added an angled piece to help accept
the shock while driving. We will be chroming this removable
bar. |
 |
 |
|
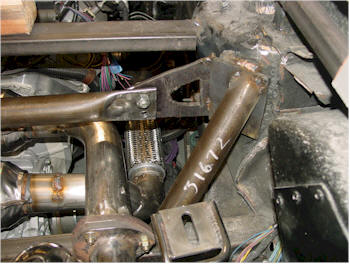
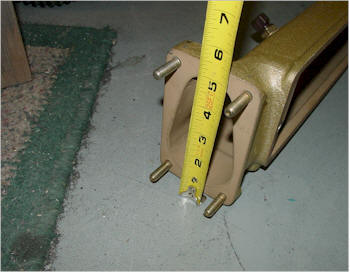
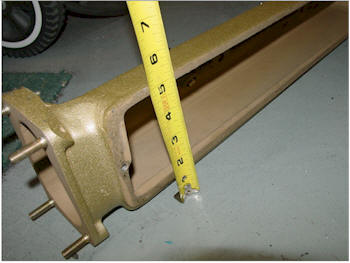
Another view of the
support. Note how we made it fit around the engine cover. |
 |
 |
|
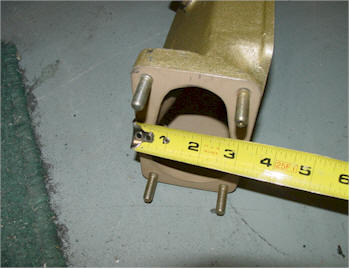
Another close up of the support |
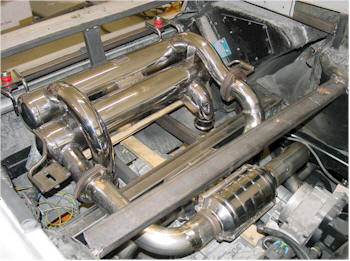
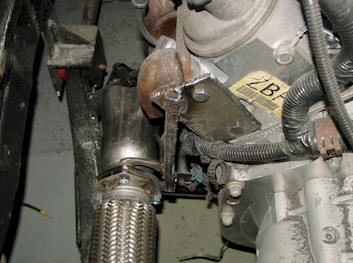
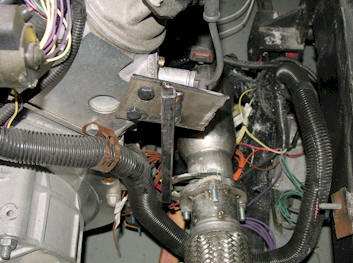
We wanted to be able to
make the headers with the engine out of the car since it would be
much easier. We fabricated a bracket that the collector bolted
to and then bolted to the block. |
 |
 |
|
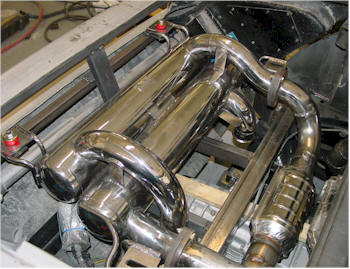
This allowed use to get the
perfect position of the collector with it out of the car. |
We added a couple pieces of
Stainless bars to connect the two independent tubes with the
catalytic converters. This adds some rigidity and allows for
the whole pieces to be installed and removed as one unit. |
 |
 |
|
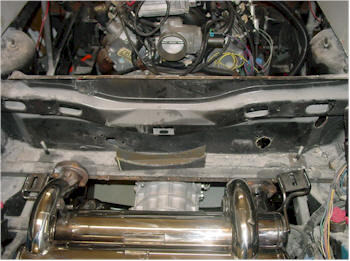
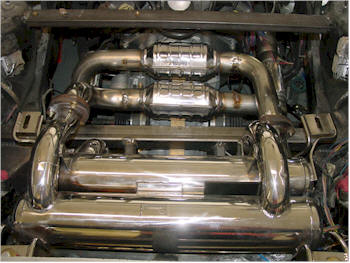
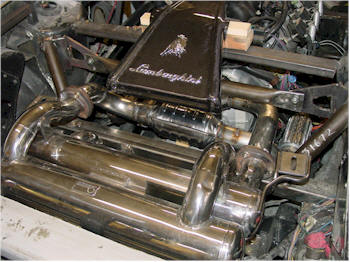
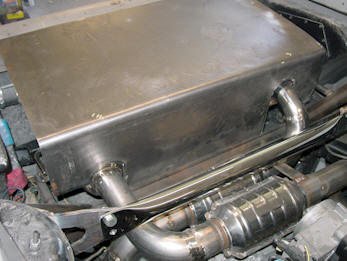
You can see in this
picture, the chrome plated cross member support. and the
semi-completed rear exhaust. The exhaust is still just tacked
at this point. |
In our quest for
authenticity we began to fabricate the muffler heat shield. We
measured this out so that once the cover is in place it will stick
out as far as the original. |
 |
 |
|
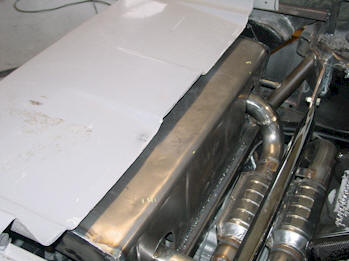
We purchased Kevlar foil
cloth that looks exactly like the original that will be sewn with
Nomax thread and then glued to the cover with Furnace Adhesive for a
finished look. At this point the top pops in and out since it
is a large flat sheet. |
To prevent the "popping" of
the sheet metal we used a bead roller on all the flat panels which
added much more rigidity. It looks nice too however it will be
covered with the heat shield cloth so it will not be seen. |
 |
 |
|
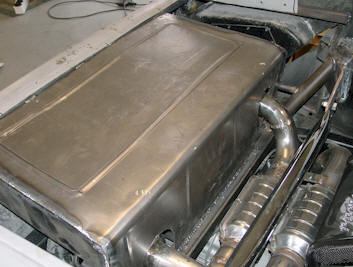
With the cover we test fitted the heat shield and
it is in exact proportion to the original |
 |
 |
|
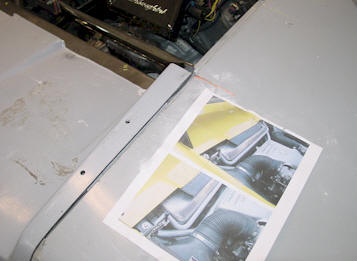
We taped a picture of the
original to the work area to ensure everything that was done
mimicked the correct placement of the original. |
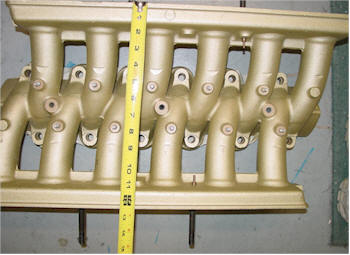
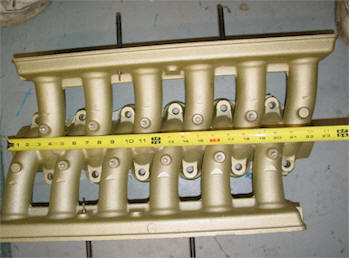
Curious to what this is?
Well we got a hold of a brand new Intake manifold complete with
Throttle bodies. In case you were wondering how big this ting
is actually I took some pictures to show you. |
 |
 |
|
All these
parts cost about $14000 and right now I can not bring myself to cut
it to fit the engine. I am looking into casting a composite
plastic version and then modifying that to fit. If that does
not work then I will get out the plasma cutter. I am hopeful
the plastic parts (That will be able to be bolted together like the
original) will look identical including Aluminum powder to give it
the look and feel of aluminum. I will keep you posted. |
 |
 |
|
Did you know
just one of these side pieces cost about $2000 and the middle
section cost over $7000 |
 |
 |
| |
|
 |
 |
|
For those of you who want
to know what the logo is supposed to look like on the intake |
This is the $7000 part.
Ouch...More than the cost of the engine X2! |
|
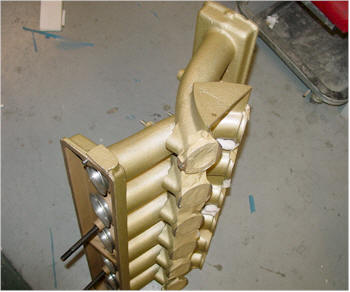
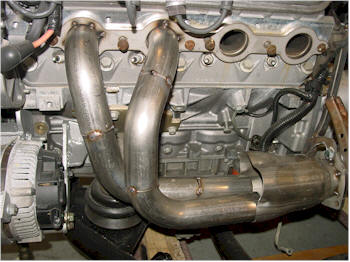
Custom headers
Making your own headers we
thought would be very difficult and out of the range of the typical
hobbyist. Not only did we want headers that worked, we wanted
it to look good and we wanted Equal length. (This is where
each tube from the head to the collector on both side) is the same
length for a balanced exhaust. We wanted to know how hard this
process was and if we could recommend it to anyone else to do.
So far this is completely easy to do. It is however a time
consuming process but the result will be both beneficial and
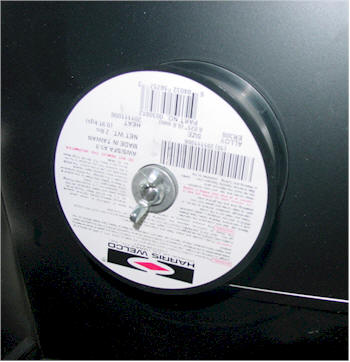
rewarding. Since we decided to use stainless we tacked the welds
with a MIG running Stainless wire and a TriMix this proved very well
and easy to work with. It only costs us .17 cents a day to
rent the tank se we have a long time before we need to get it back
and it was very cheap. You CAN use your regular MIG to tack
the headers together however you must make sure the when you go back
over it with a TIG that ALL the old steel is removed otherwise you
will get a mix and if any steel that is exposed WILL rust unless you
plan on painting them, in which case you really do not need
stainless. Since we wanted equal length headers we needed more
bent tubing to work with than your standard header kit.
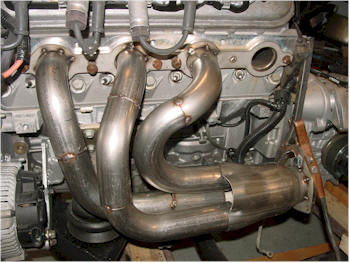
The first step is to determine how
long your tubes need to be.
After some calculations we took a
wire to determine what ideal length would work with each tube.
Our "magic number" was 19 3/4" |
 |
 |
|
We cut one ridged wire at this length
and started with the furthest cylinder. (this was the easy one with
only two bends.) For the first tube we tacked it to the flange
AND the collector. This one we tacked more because when it is
done you want to be able to remove all the tubes in order to weld
around them and in our case also polish. Trying to do this
while it is assembled will be difficult if not impossible. By
making a permanent connection on one pipe (the first one) you will
have the exact dimension and placement of the header and all
you need to do then is place the finished tubes in to complete the
header assembly. |
 |
 |
|
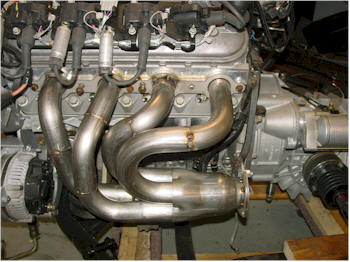
Next we took the SAME wire and re-bent
it for the next cylinder. Also an easy bend. TIP: If you go
to your local Lowes or Home Depot there is a wire that is used for
installing suspended ceilings, It comes in a roll and it a little
thicker than a coat hanger and it cheap, easy to cut and bend.
I started using this after I began to rob my house for wire coat
hangers and upsetting the wife. |
The second tube now installed.
It only has two small tacks on the flange because it did not want to
stay put. It will be removed when we are done. |
 |
 |
|
We continued the process for the next |
And then the last one |
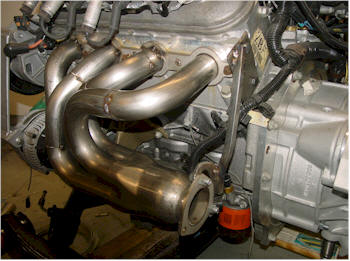 |
Off to the Tig welder then to the
polisher then re-tack welded and then back to the Tig welder then
back to the polisher... More pics to come.... |
| Here is the completed
header. It is ready to be disassembled and welded. We sill
need to add the OS weld bung for the Oxygen sensor. Now we are ready
to work on the other one.
Before we complete the exhaust we need to get the proper placement
of some of the rear fiberglass pieces. When this part is
completed we will return here and finish the Exhaust tips. |
|
| |
|
| |
|
| |
|
| |
|
| |
|