 |
|
| Home | Current Progress | Donor | Engine | Chassis | Exterior | Interior |
|

Power Steering
I tell you I am almost sick of hearing the Fireo "Tech Geeks" who are determined to tell me that installing Power Steering on a Fiero or a Fiero based kit is impossible. After searching Ebay for the last year or so looking a Racks. (I would rather just go to a Junk Yard to look but things have changed over the years and there are now fewer and fewer that let you scrounge around) Then one day I came across a rack claimed to be from a 1985 Chevrolet Chevette. It looked almost identical to the Fiero rack so I snatched it up for $50. When I received the rack it was indeed VERY similar to the stock Fiero Rack except the Tie rods were 5 Inches Shorter (2.5" on each side) than the Stock Fiero's. That was no big deal since I have a 3" extension from Held Motorsports already. The Fiero rack with no tie rod ends or the extensions measures out at 46" (end to end) The Chevette only measures out at 41 1/4" which make a total difference of 4 3/4" the extensions (or Approx 2 1/2" each side) So I concluded that I would need an extension piece that is 4 1/2" (2" from the original extension and then 2 1/2" from the smaller rack difference) So a 4 1/2 extension would work because if I need it shorter I can simply grind down the rod (Too much is better than too little)
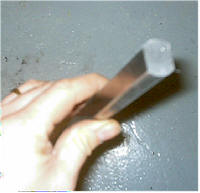
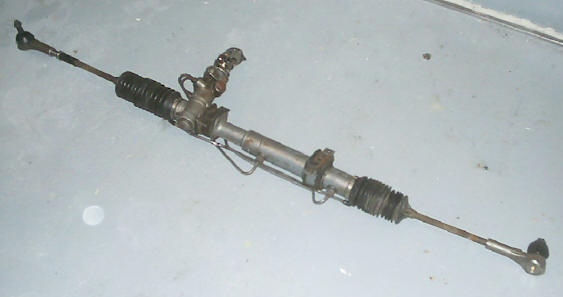 This is the Power Steering Rack from the Chevette
|
|
 |
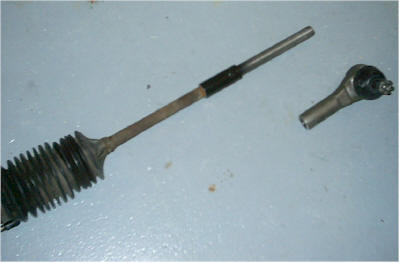 |
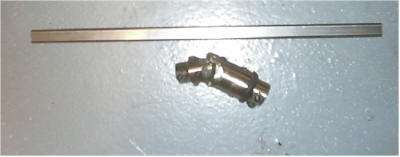
| These are the NEW Tie Rods ends from Dave Held (Held Motorsports) | Tie Rod Extension attached to the New Rack |
|
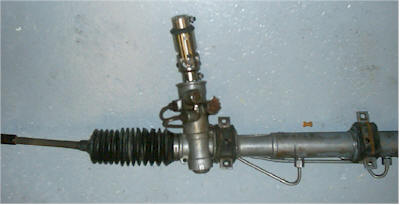
The next hurtle is to mate the Fiero Steering column to the Chevette
Rack. The Chevette rack has a 3/4" 30 Spline male head coming from it.
and the Old Fiero rack uses a 3/4" DD After you disconnect the Steering
Column from the Fiero rack there is a steering coupler will come out.
You may have to give it a good yank from the column since there is a DD
rod that is inserted into a Female end on the Column. It is held
together by two plastic pieces. The reason for this is because if
you were ever in a wreck head on if the rack could push the steering
column in to you. The DD rod has about 6" of "play" where it could
be driven up into the column without moving the column in the event a
collision occurs. I would also like to add that for those of you
who are shortening their columns by simply driving the column down
removing the "Extra" play give it some thought. If you are
involved in a head on collision and the steering rack is pushed, with no
play the column could be pushed into or through you. In my option
you should shorten the DD rod if you intend to shove the Column inward
to look more authentic. Enough said here. After you remove the
steering coupler you will notice what is called a Vibration dampener
attached to the U Joint and then connected to the DD rod. In order
to replace this very important item (Vibration from the road) We
purchased a Vibration U Joint and a 18" piece of DD rod from
Flaming
River. We cut the DD rod to 7 1/2 " as this is all we needed for
the job.
|
|
 |
 |
| Here is the DD rod and Vibration U Joint from Flaming River You will need the U-Joint to be 3/4 " - 30 X DD (PN# FR1814 3/4"-30 X 3/4"DD) | You can see why they call it a DD rod. |
 |
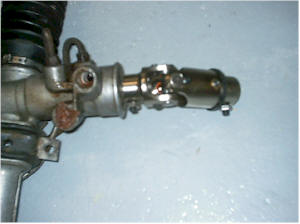 |
| Here is the new Joint installed on the rack | Close up of the Joint installed |
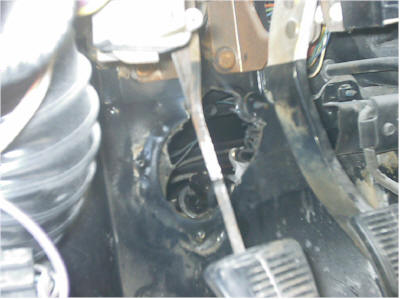
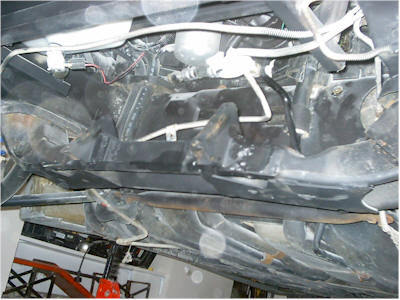
The Next step is installing the rack into the car. You will have to do two things. First the original hole in the "firewall" is too small so you will have to cut about 2 inches up and to the right (If sitting in the car). We CAREFULLY used a plasma cutter and it was done in a few seconds. Otherwise you could use a saws-all or a nibbler. The other is to cut off the old Fiero mounting brackets. When we got the rack I requested we also have a pieces of the cross member with the Chevette's brackets intact so we could use the original mounting brackets for the rack. We then bolted the Chevette's mounting brackets to the rack and carefully measured and centered it on the cross member. We then tack welded the brackets in place and removed the rack leaving the brackets. The most important thing in placing your rack is that is is centered on the car. If you measure from where the Rubber boot starts on both ends then divide that number will be your center point. You can then verify that by turning the rack all the way from one side and then all the way from the other side and then divide that number. It is not too terribly hard to do. and if you are off slightly it is not the "end of the world" and you will probably never notice. However this does not mean that you should not be careful in the installation and try to center the rack as closely as possible. |
|
 |
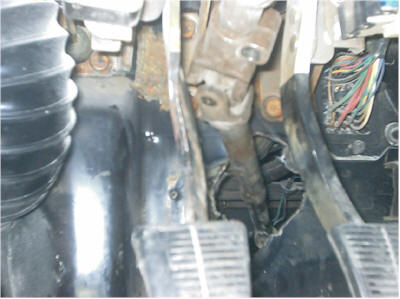 |
| The steering hole widened at the top to accommodate the new rack | This is still the old rod however you can see where the hole is in relation to the existing column |
 |
 |
|
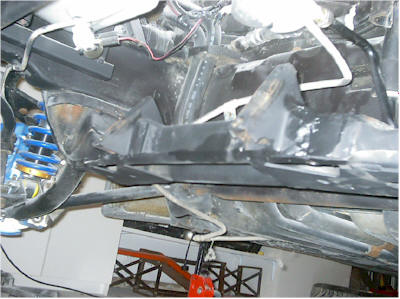
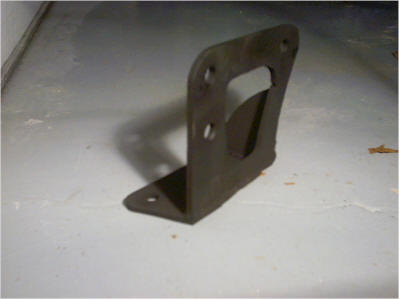
Here you can see the NEW Chevette mounting brackets |
|
Now we move on to the rear where if you recall we were using a West Coast Fiero Engine mount, which uses the Fiero's stock engine mount location. Well the problem is that most all 3800's use an oil adaptor that will interfere with the Fiero's engine mount. In order to use the engine mount you have to have an oil adaptor that has too Clear the Drive axels, Clears the Engine Mount AND so that you can mount the power steering pump. Well after about 6 months of searching there just simply is not a way. I did read that the 2003 Police Impalas use an external engine oil cooler and has a special Engine Oil adaptor that has two oil line nipples instead of the bulky oil neck. I contacted almost 20 dealers including Fleet dealers that would not or could not help. I was told that I could order the parts from AC Delco IF I had a VIN number. I even work with the local city here and no one was going to give me the VIN number off of a Police Cruiser.. not that any one even had one around. And to top it all off I had no idea what it looked like or if it would even work. So after 2 years of welding I just decided to make a NEW engine mount location. It took about 2 hours and I was able to install the ORIGINAL oil adaptor AND the power steering pump |
|
 |
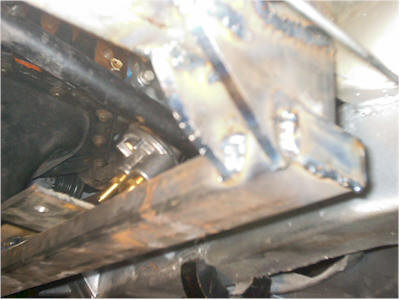 |
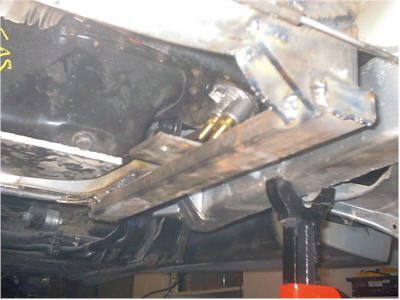
| The new Engine mount had to mount to something under the engine. So I welded a piece of 1 X 2 just forward of the oil pan (In case I ever needed to remove it while on the car) and then welded a 1/4" plate perpendicular where I would bolt on the Old Fiero's rubber mount. | |
 |
 |
| Here is the new Bracket that bolts to the rubber Fiero engine mount (In its new location) and then to the Engine block. | If you look closely you can see the bracket installed and the Original Oil filter adaptor. |
|
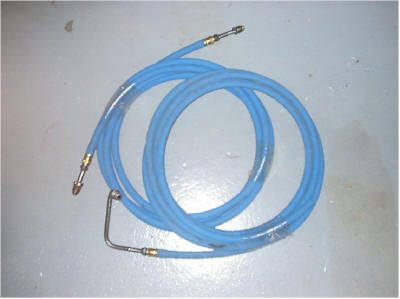
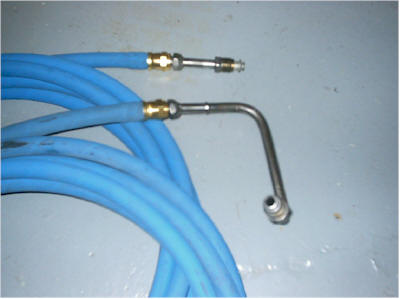
The last step was to connect the Pump to the Rack. For this we elicited the help of Sterling Rubber (Dayton, Ohio) to fashion 15 Ft of hydraulic power steering hose. They did a wonderful job of mating the old fittings to the hoses. |
|
 |
 |
|
The New hoses from Sterling Rubber |
|
 |
 |
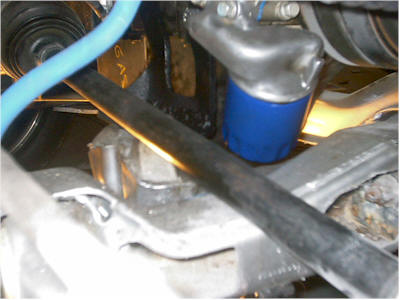
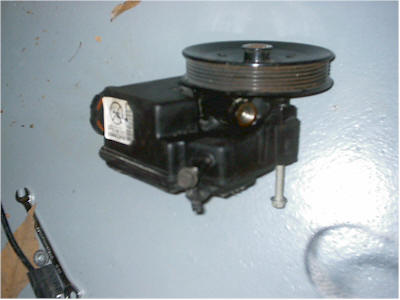
| The 3800 Power steering pump | We took time carefully mounting the hoses as to avoid crimping, Twisting, or road damage. |
| That's it! After filling up the Power Steering reservoir we fired it up and it worked like a charm. I will be creating a new piece of steel to cover the hole where the new steering connector is however the task was quite simple and less than a couple days work. | |