The Transmission selections
for the Small block Chevy (in our case the LS1) are not to wide.
People have used Audi, Pantera, and the Pantera styled ZF transaxle
but by far the most common and trouble free is the Porsche
transaxle. The porches offer several options from the 914, 915
930, G50 etc.. When it was time to choose our best option we
contacted
Renegade Hybrids and spoke with probably the most knowledgeable
person there is with mating SBC to Porsche transmissions, Scott.
After bugging Scott for over a week and soaking up as much
information as possible I made my recommendations to the staff and
we decided to go with the best transmission that was available the
930 conversion. Renegade made the purchase and installation
trouble free and anytime we had a problem they were just a phone
call away and always ready to help. We must warn you if
you want information, Scott has it, I don't think we could
come up with a question that he could not answer and his answers not
only to the point but he also took the extra step in explaining why
something was "that way" Before settling on Renegade it
took a week or more for them to get back with us and with a reply
within hours from Scott the decision was easy. Just be sure to shop
around and gather information and speak with other builders who have
used similar transmissions. A reputable dealer should be
willing to provide references and you should use them. Face it
the transmission in these cars are more often than not 3 to 4 times
the cost of the whole engine itself so it is a wise person who does
their "homework" first.
Visit our Renegade
section HERE This includes some important information about
making your decision and some great photos from Scott.
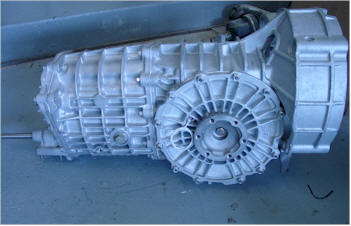
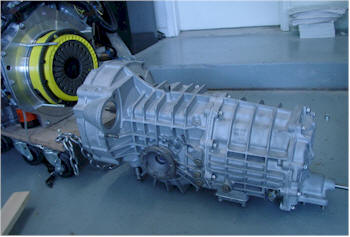
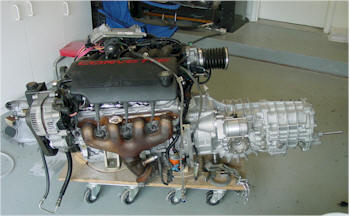
The first step
in installing the LS1 is to mate the Transaxle to the engine.
If you are used to the Ford and Chevy installation of the clutch and
flywheel, then throw out everything you have learned because a
Porsche is completely different.
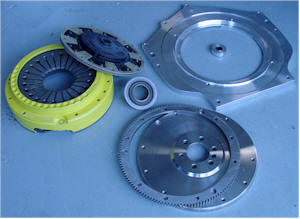
These are the clutch and adaptor items
we received from Renegade Hybrids. Everything was clean and
power coated.
The Adaptor plate is pretty
straight forward. I had the original GM Bell housing bolts
with the nice integrated bolt washer, so we re-used them.
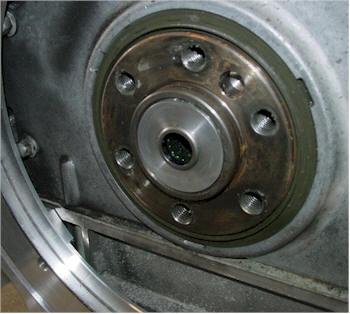
Pilot bearing installed (Letter side
out)
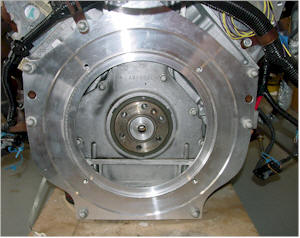
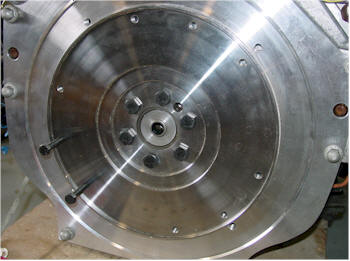
The Flywheel is then bolted to the
crank.
Using an alignment tool
(Universal type from NAPA) we centered the Clutch to the flywheel.
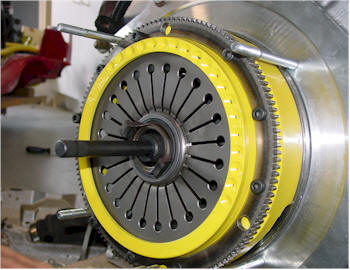
This is one thing that is different than what you may be used to
seeing in a SBC is there is a ring gear for the starter that is
bolted on with the clutch. We fasten it with hardened Alan
head bolts
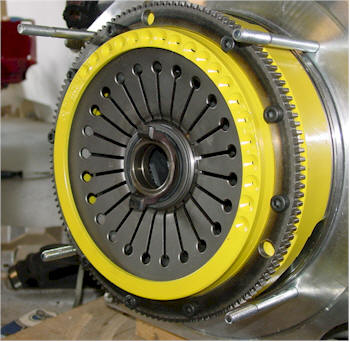
There is another major
difference between the standard Ford or Chevy throw-out bearing.
We got this wrong the first time and are glad we realized the
problem. Instead of the throw-out bearing pushing in on the
fingers to release the clutch disk the Porsche actually PULLS the
fingers out. We would never figured this out unless we saw the
wear marks on the clutch forks.
After it was installed it
was just a matter of sliding the forks over the throw out bearing to
slip the transmission on. On word of advice the whole clutch
fork assembly slides up and down just a hair. This will help
facilitate the proper engagement of the fork through the Throw-out
bearing.
With the Transmission in place and
bolted to the Block we then add the Starter to finish off the
installation. You may consider covering the holes around the
clutch area of the bell housing. You will thank us later once
you drop a screw and it does not enter the bell housing.
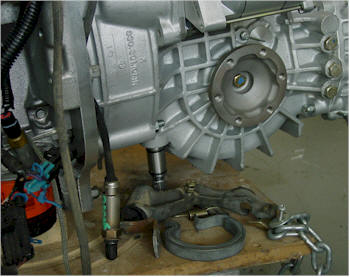
Clutch
Because of the cradle mount I was not able to mount the slave
cylinder on the original location. I also did not like the
fact it would point toward the rear were there is just simply no
room to spare. After staring at it for over an our and
thinking of a hinge type to reverse the mounting position I decided
to simply make a bracket welded to the other side of the clutch arm.
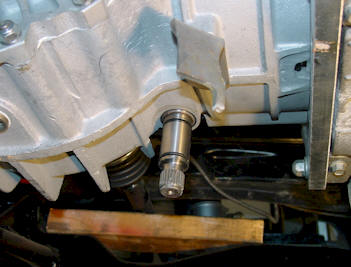
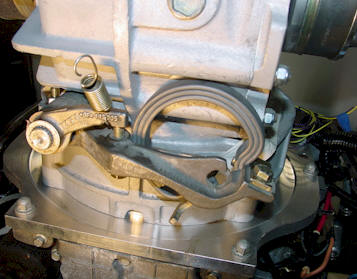
Here is the Clutch shaft before
putting the linkage.
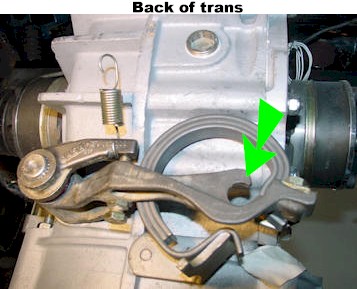
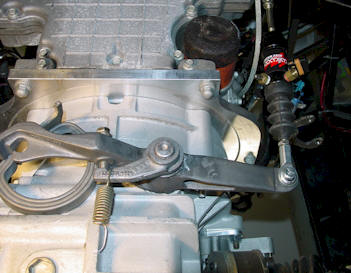
With the stock linkage installed it
was evident that there was not enough room to install the slave
cylinder. The arrow indicate where the original linkage rod
that would be pulled toward the back of the transmission.
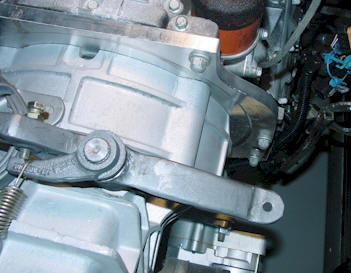
Another view of the stock
linkage.
Here is a picture of the bracket
welded to the other side. There are actually two pieces welded
together in a triangle to added strength. We measured from the
center of the shaft to the stock location of the original rod
mounting hole (5 1/4") and mage the exact lenght and hold on the
added bracket so the pivot would be the same as the other side but
moving in the opposite direction.
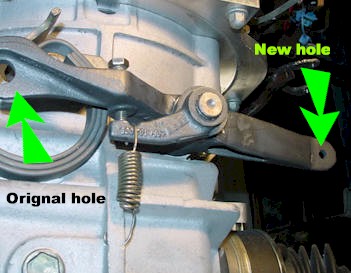
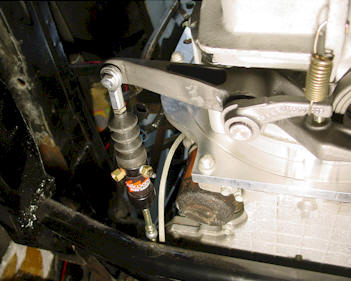
Another view of modified linkage
You can see here the now and the
original rod linkage hole
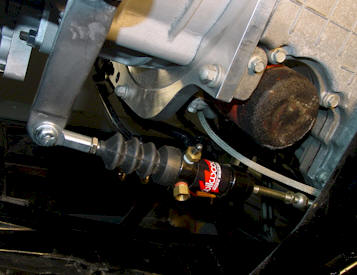
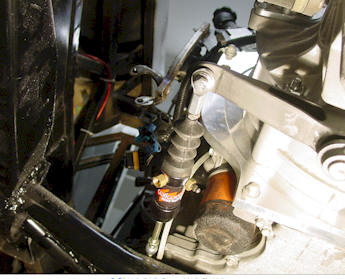
Here is the Wilwood slave cylinder
temporarily attached to the linkage.
With the new location there is plenty
of room for the slave cylinder. *Note how the bracket was welded.
You can see the two pieces together here.